
Strain gauges
In this guide, I will walk you through setting up a strain gauge measurement with a NI-9237 DAQ (both strain gauges and NI-9237 DAQ are available for checkout) in the quarter bridge (1 active strain gauge) configuration. Other configurations are possible.
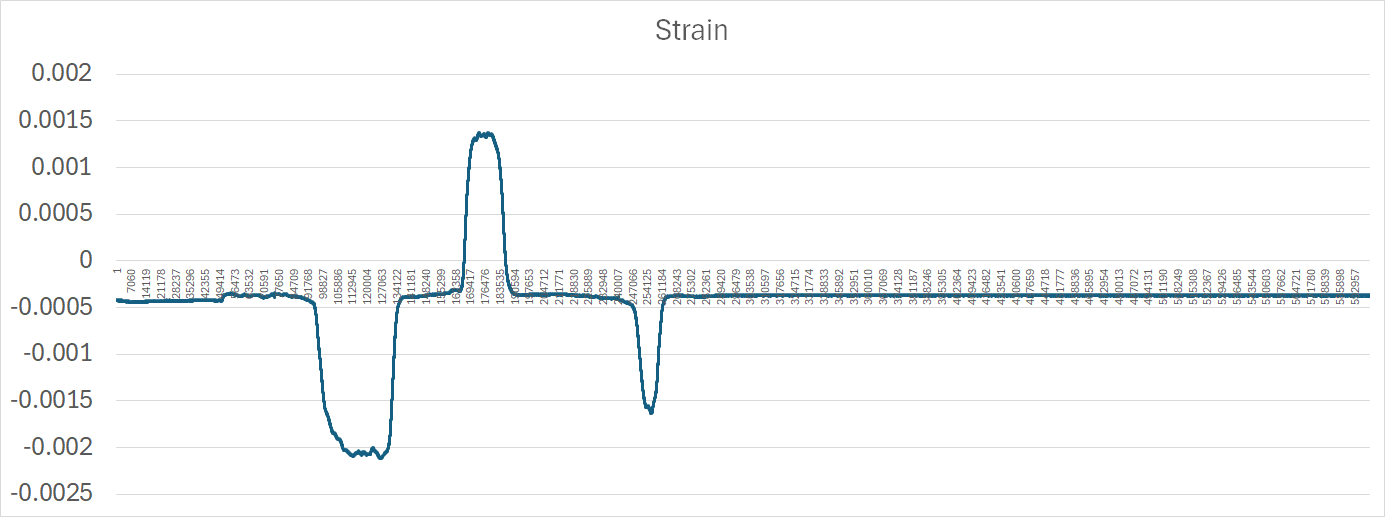
Data from the test setup below (bending the aluminum bar below with hand strength of an ESS test subject):
You will need:
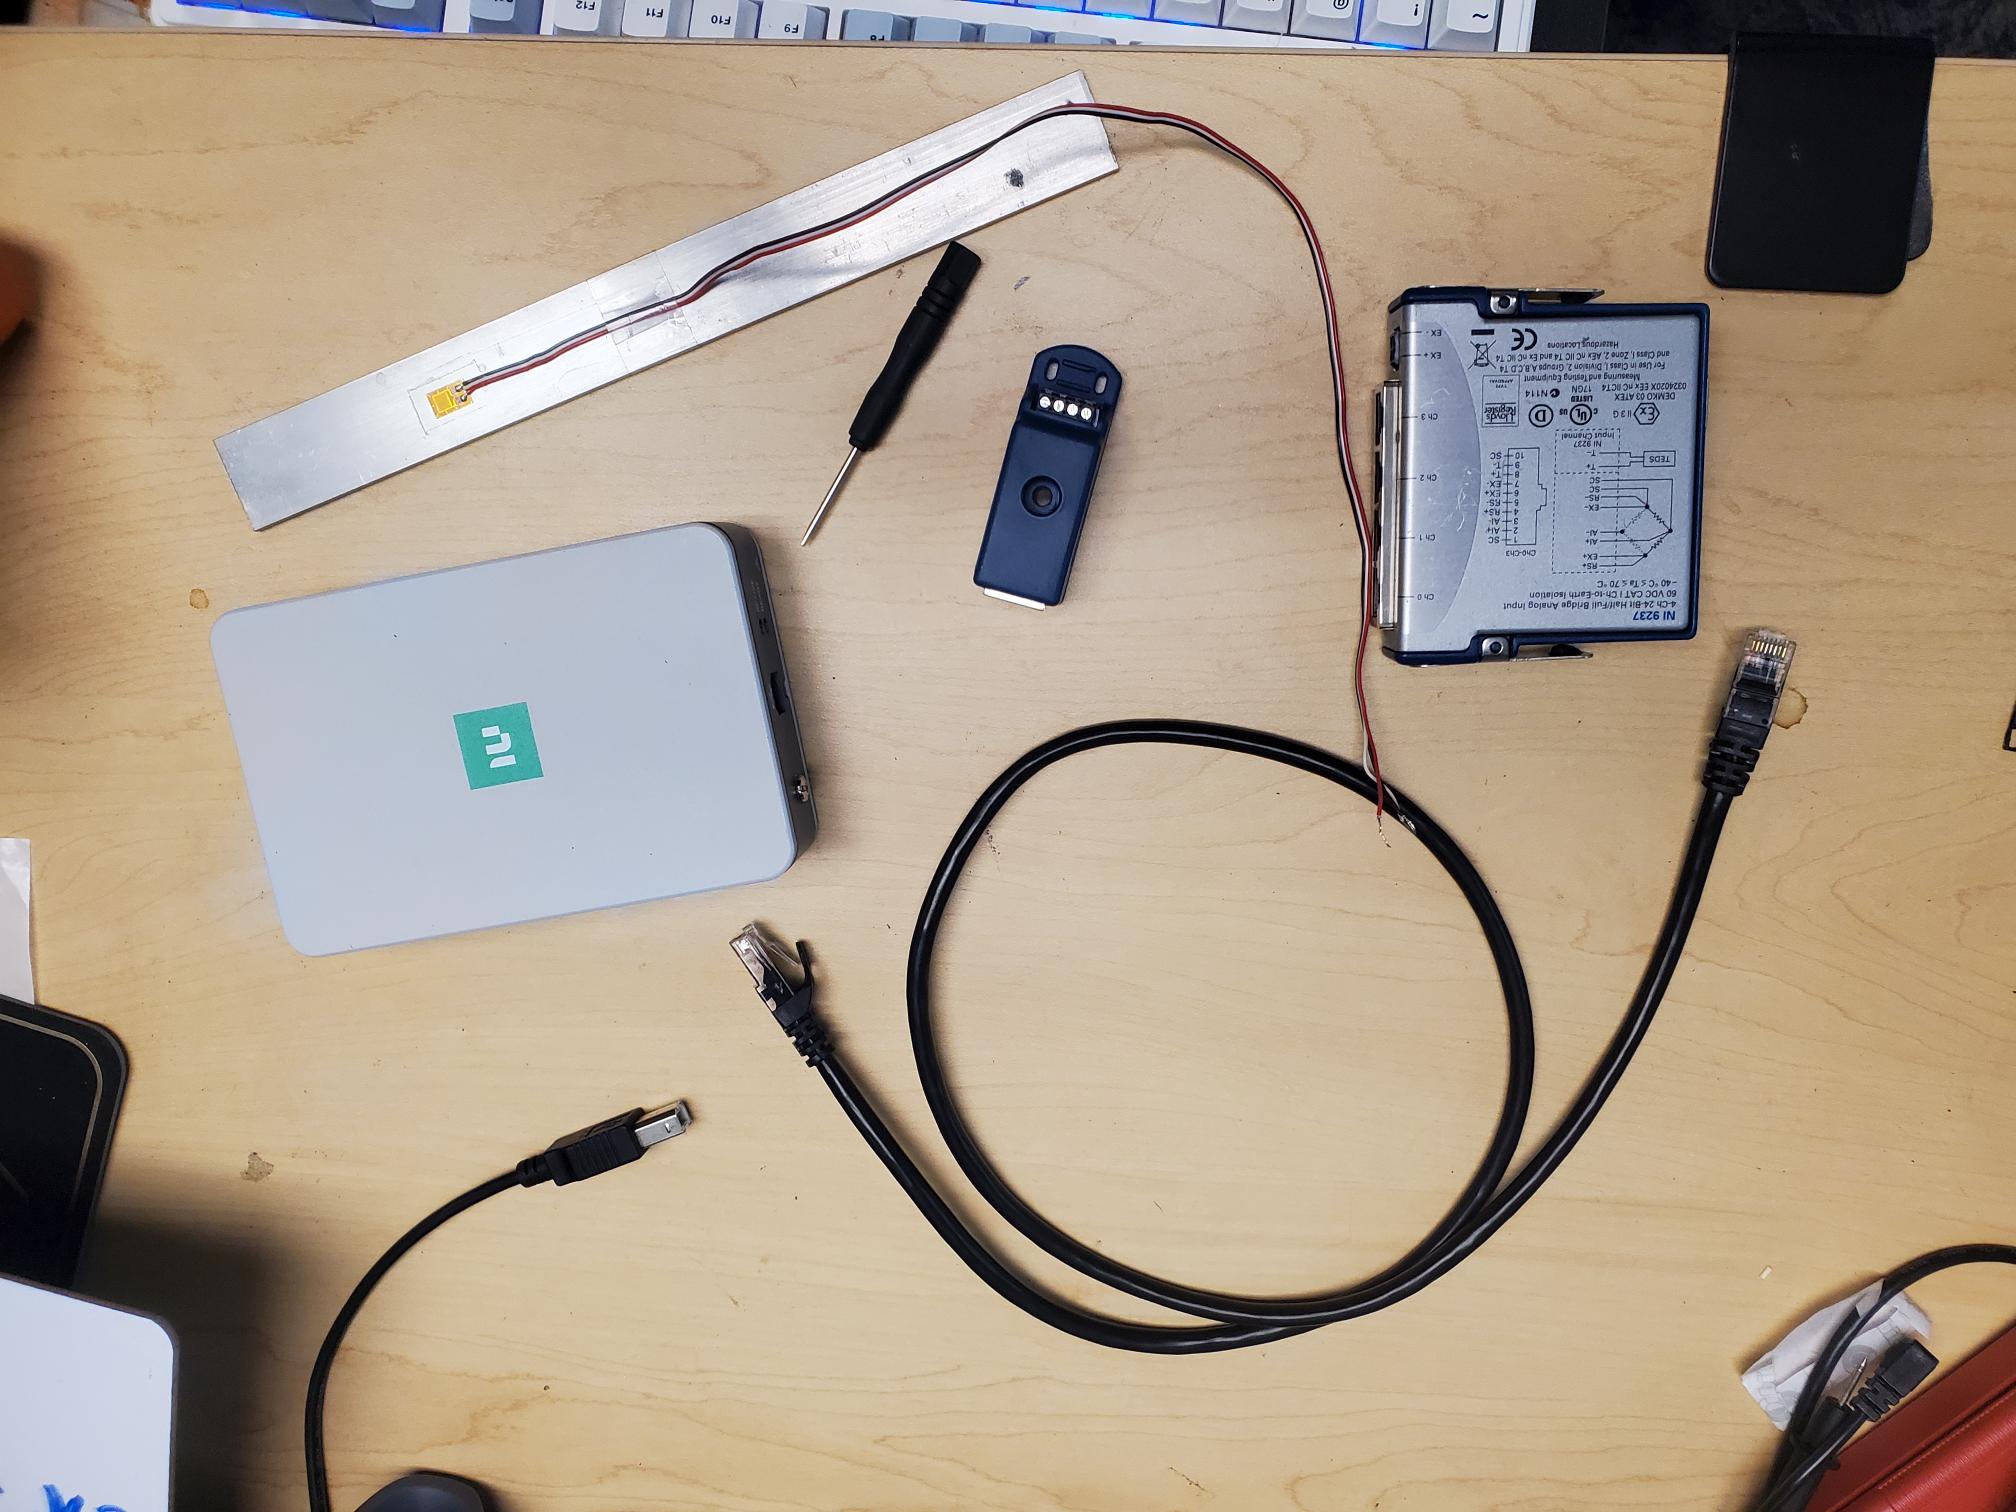
- 120 Ohm Strain gauge with soldered leads, bonded to a metal substrate (how to bond will not be covered in this tutorial)
- NI-9237 DAQ & chassis
- RJ-50 cable (looks like ethernet, but has 10 pins instead of 8. An ethernet is an RJ-45 cable)
- USB B-A cable
- wee screwdriver for installing strain gauge leads to NI-9944 screw terminal block
- NI-9944 (precision 120 Ohm resistor)*
*note : if you are not using a 120 Ohm strain gauge, use the appropriate terminal block that matches the nominal resistance value of your strain gauge
Hardware
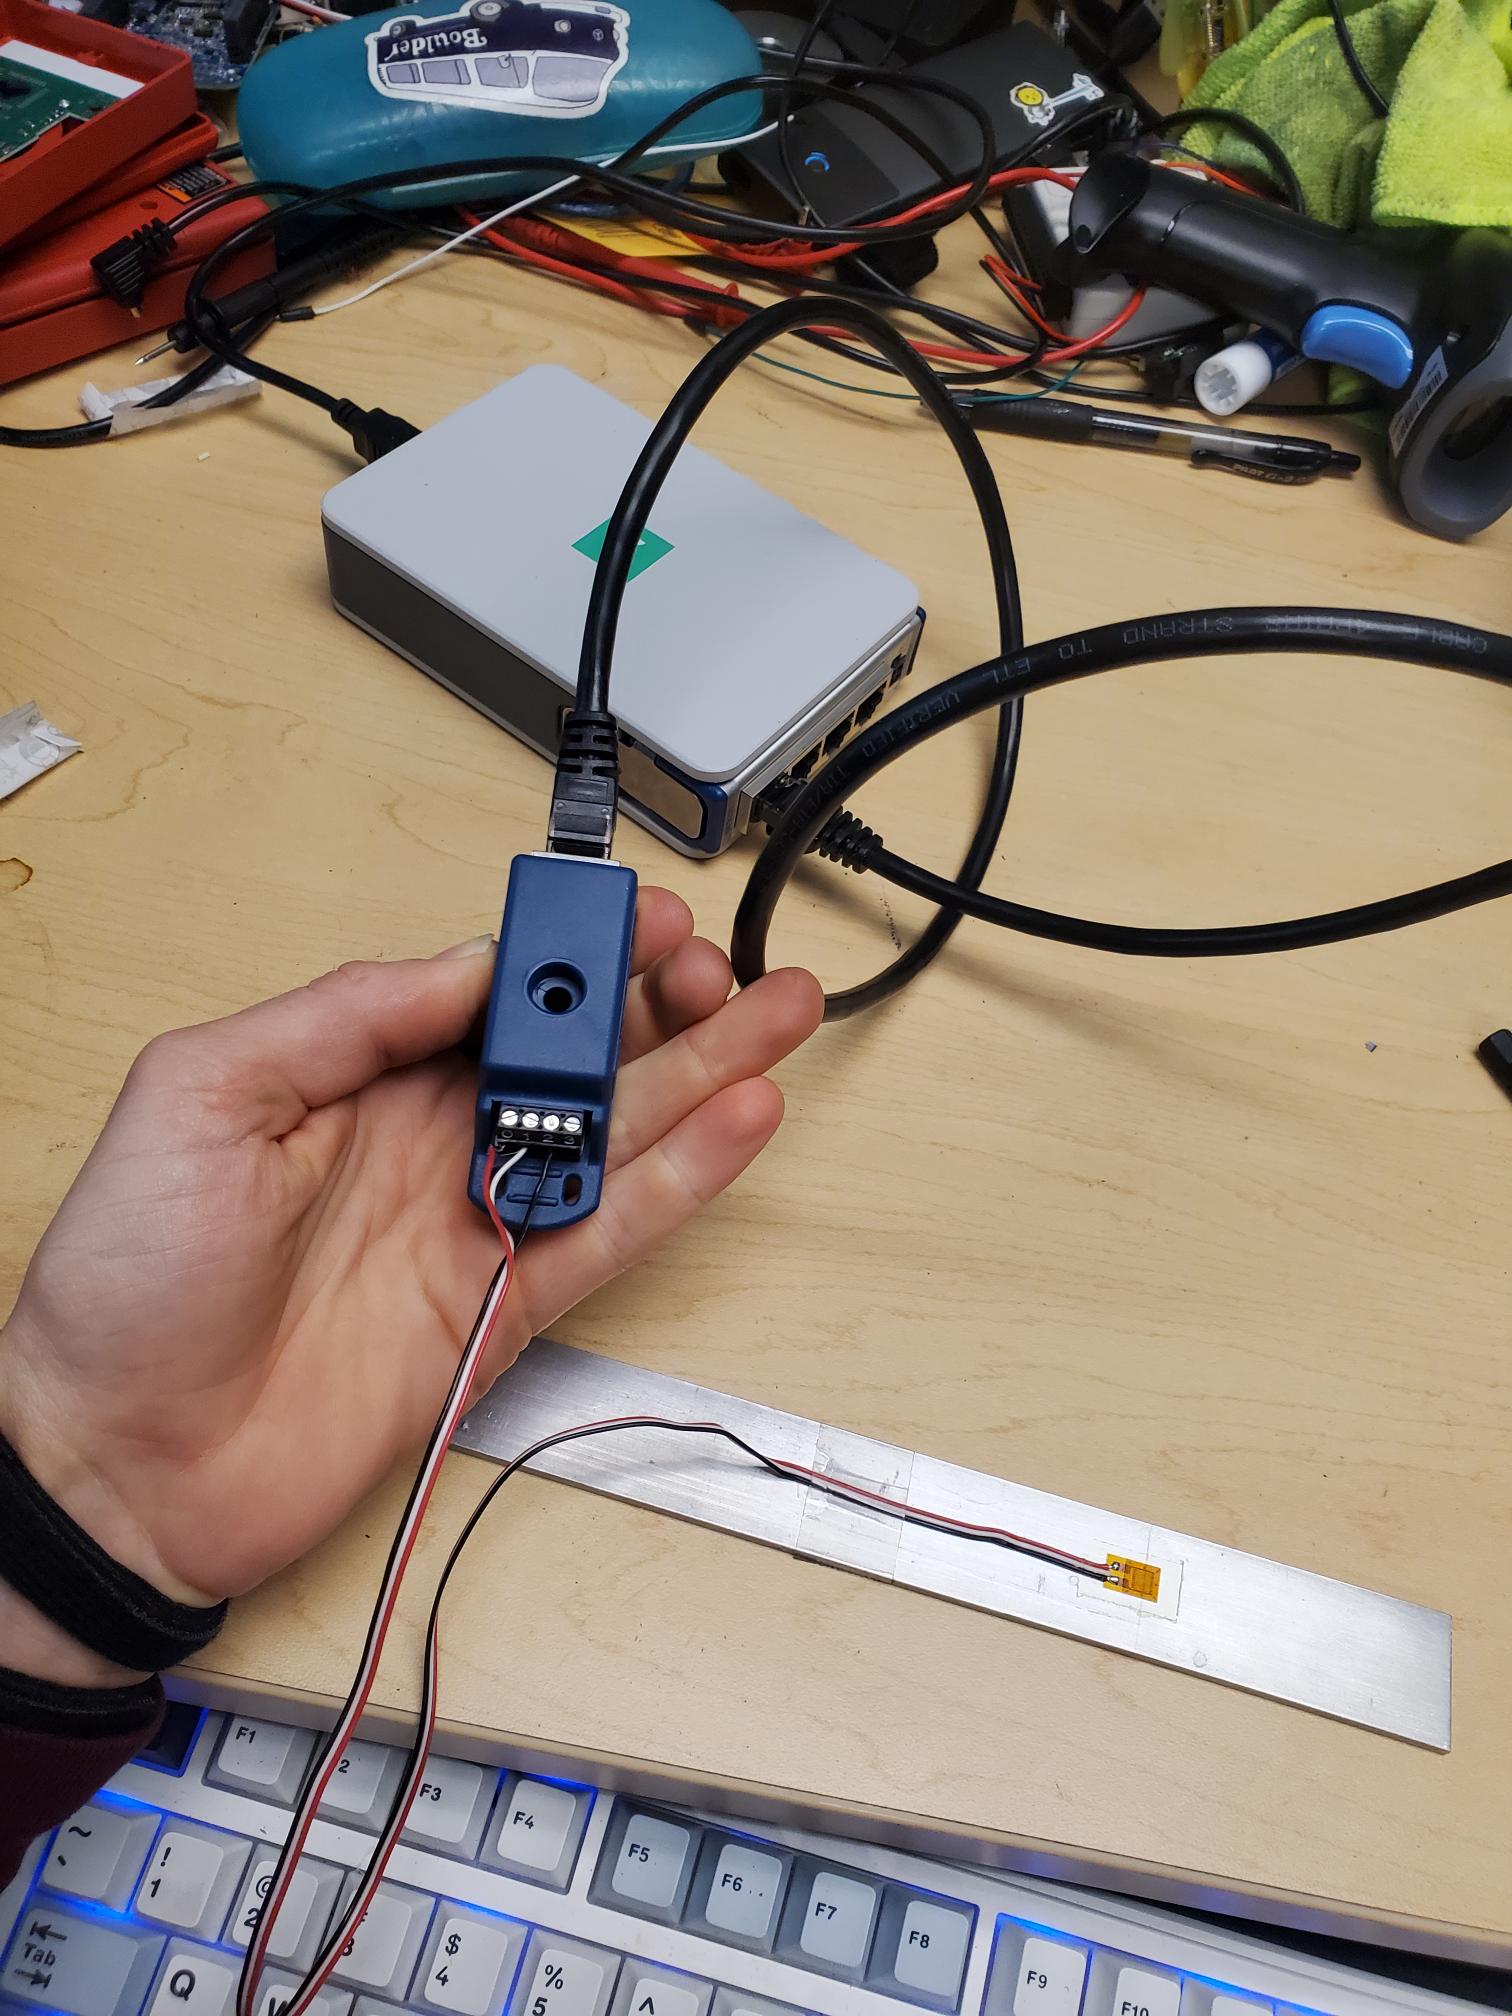
Pin 0 on NI-9944 attaches to red lead of strain gauge attached to one side of strain gauge
Pin 1 and 2 attach to white and black leads, which are connected to the same point on the other side of the strain gauge
Software
Effectively we are just following this guide from NI. I would recommend using LabVIEW.
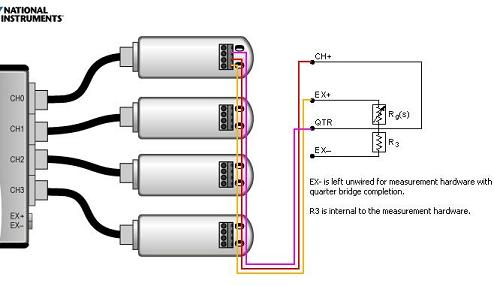
I will point out a couple of things below that might not be obvious from the guide:

Select "strain" (analog input) when you configure the DAQ assistant in LabVIEW. This will bring up the menu above.
- The scaled units generated are already in strain. How convenient! LabVIEW is solving the following equation for you (equation source):

recallRecall that the definition of strain is change in length divided by original length. So 1 microstrain = a change in length of 1 mm for a 1 km long bar. Wow - that's not a lot of strain! What is the strain if a 5.00 cm bar is compressed and now measures 4.95 cm?
- The
- answer to the question above is 1% (0.05cm/5.00cm)
- Gauge factor and gauge resistance are properties of your strain gauge. You can directly measure the gauge resistance using a multimeter in resistance measurement setting, and the gauge factor is something you will find on the packaging for your strain gauge. It relates the relative change in resistance for a given strain. It is typically around 2.
- Quarter bridge configuration means you are using 1 active strain
gauge.gauge, and the other three stain gauges in your Wheatstone Bridge circuit are static gauges . For some tests, it might be better to use multiple strain gauges. - In my own testing, I measure the lead resistance and if I can't get a reading, I leave it as zero. If your leads off of the strain gauges are really long, you might measure 1 ohm, in which case you would put "1" in the Lead Resistance box. The leads coming off of your strain gauge should all be the same length for accurate temperature cancelation. Specifically, by having leads on the top and bottom of your wheatstone bridge circuit, any resistance effects due to changing temperature should cancel out since you are adding identical "resistors" to the top and bottom of one of the voltage dividers in the wheastone bridge. See my article on wheatstone bridges if you are confused.